With its many advantages, the Smart IMS is being adopted by more and more fleets. You’ll find that many of the steps are like any IMS replacement. However, with a Smart IMS, there is an additional lead to be terminated to the motor terminal.
Removing the Starter
To begin, disconnect the batteries from the vehicle to make it safe. Then remove the starter from the engine per the vehicle manufacturer’s instructions. Once you have the unit off the engine, you’ll need to:
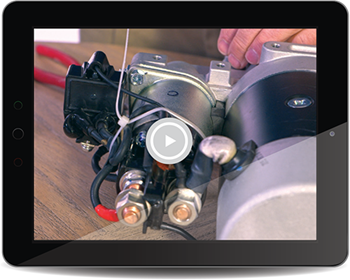
- Remove the IMS leads from the motor terminals.
- Remove the IMS from the motor. (Tip: Keep all fasteners for reuse.)
- Remove the solenoid motor terminal nut.
- Clean all connections in preparation for reassembly.
Installing the Smart IMS
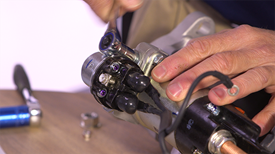
- Begin by mounting the ground lead, if required, between the IMS mounting and solenoid ground terminal.
- Mount the new Smart IMS onto the motor.
- Attach the Smart IMS motor terminal lead (a small diameter wire with large ring terminal) to the solenoid motor terminal.
- Attach the Smart IMS battery terminal lead (with a red insulator) to the solenoid battery terminal and keep finger-tight until mounting on the engine.
- Attach the Smart IMS switch terminal lead (with a small ring terminal) to the solenoid switch terminal.
- Next, secure all leads to the solenoid with provided zip tie and assure all fasteners are properly torqued.
- Finally, reinstall the starter per manufacturer’s instructions and reconnect the batteries.
Watch Our Smart IMS Installation Video
Our latest
Tech Tip video shows you how to install the Smart IMS.